

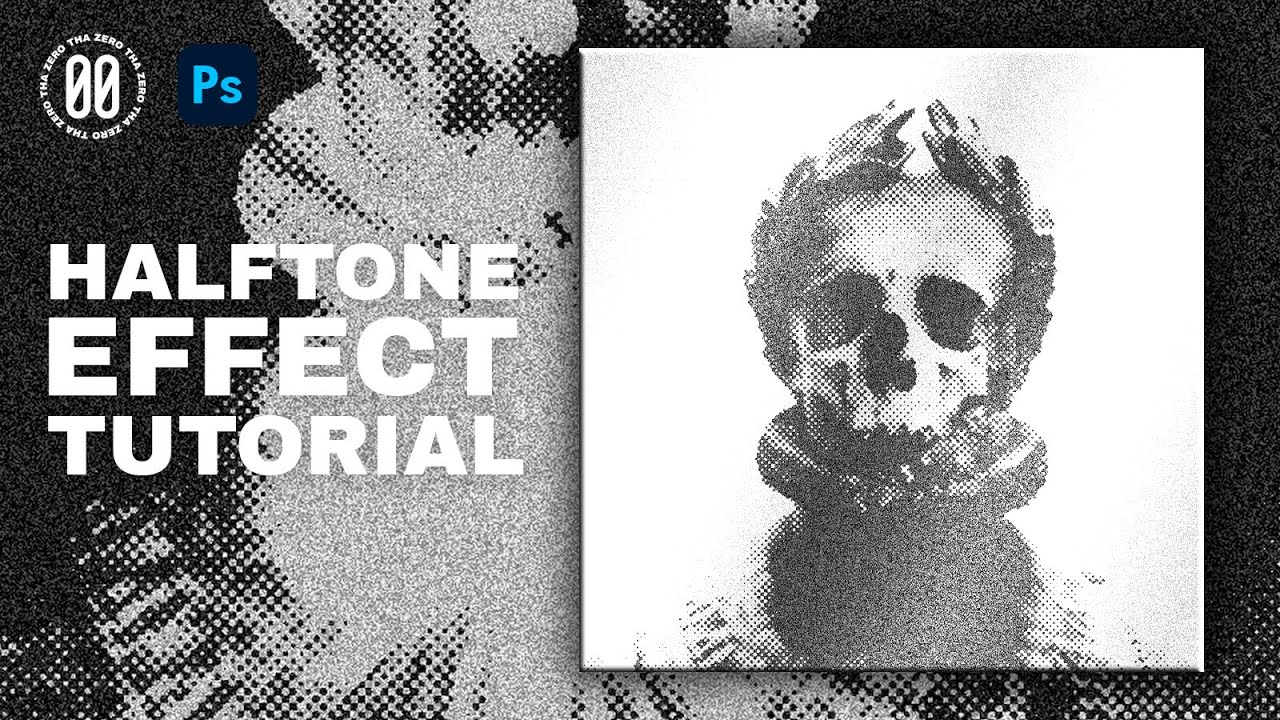
Hello! Welcome to this new tutorial, today I’m will show you how to create the halftone effect.
To create this type of effect, we need to apply 4 filters from the “filter gallery” section to the image.
But first, you need to prepare the image correctly.
First, we remove the saturation, transforming the image into black and white.
Then you have to increase the contrasts, the shadows and the lights.
I have used a “brightness/ contrast” and “curves” Adjustment
Go to filter, open “filter gallery” and here we can create our effect.
If you want to quickly modify this effect, before opening the filter gallery, convert your image in a Smart Object.
The first filter is RETICULATION, set density to 0, foreground to 2, background to 36.
Next is GRAIN, set intensity on 20, contrast on 34.
Now we can apply the halftone pattern filter.
In my case, I set the size to a low value (2), but you can raise it according to the effect you want.
Set contrast to 50.
The last filter to apply is film grain.
Set grain to 11, highlights to 18 and intensity to 2
well, it’s done
Thanks for following me to the end. If you liked this video, leave a like and subscribe!
Here are some good extras:
GRUNGE TEXTURE PACK
https://thazero.gumroad.com/l/GRUNGE-texturepack
PLASTIC WRAP | PNG TEXTURE
https://thazero.gumroad.com/l/PLASTICWRAP
source


